Our Do It Yourself Construction Plans are top notch, showing you the details you need to construct your building. Our full (30+ page) pole barn construction plan sets are only provided to Clients that purchase building packages. We’ll post a few screenshots here, but contact us for a full set.
“Pro Tips” are included throughout the plan set. We’re builders too and we like to share our knowledge with you to make your life a little easier.
Post Layout/Floor Plan
Two post layout pages are included for your pole barn. The first shows the exact post layout with measurements for your pole barn. The second post layout page teaches you how to layout your posts on the ground and the important steps involved.
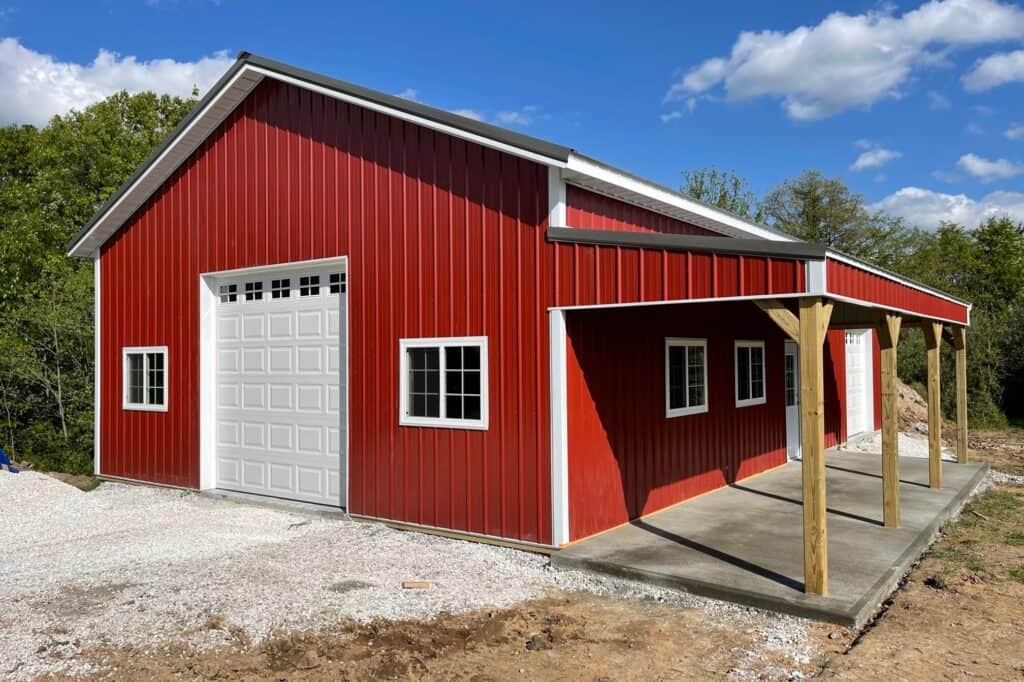
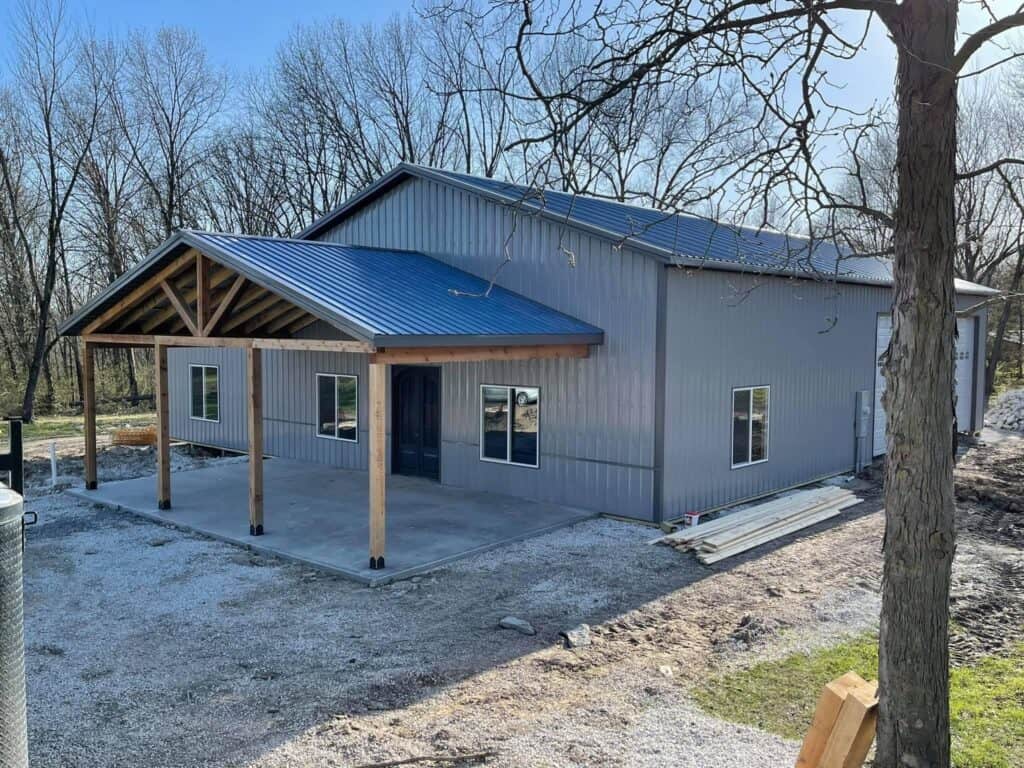
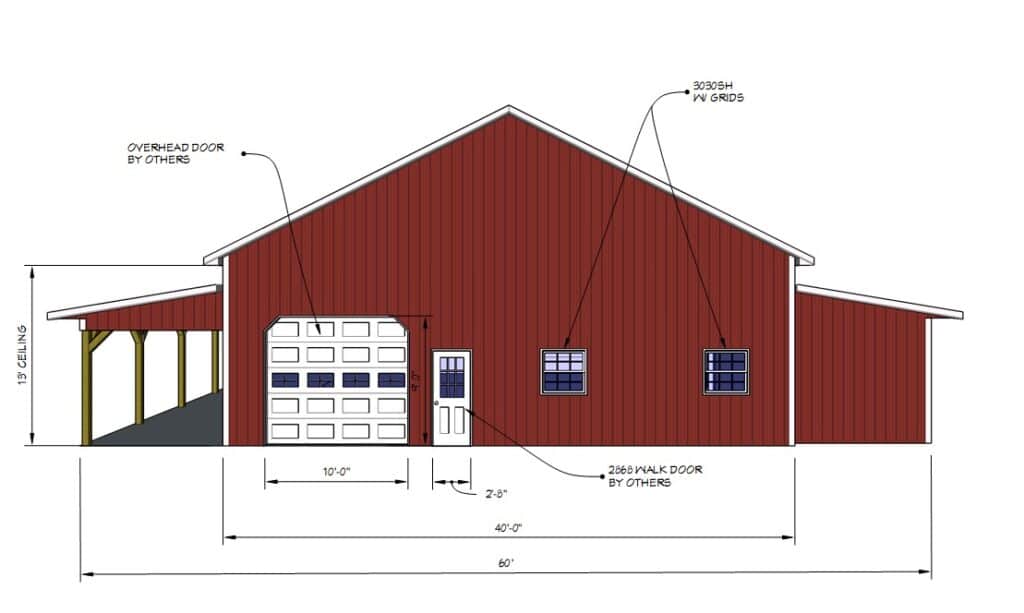
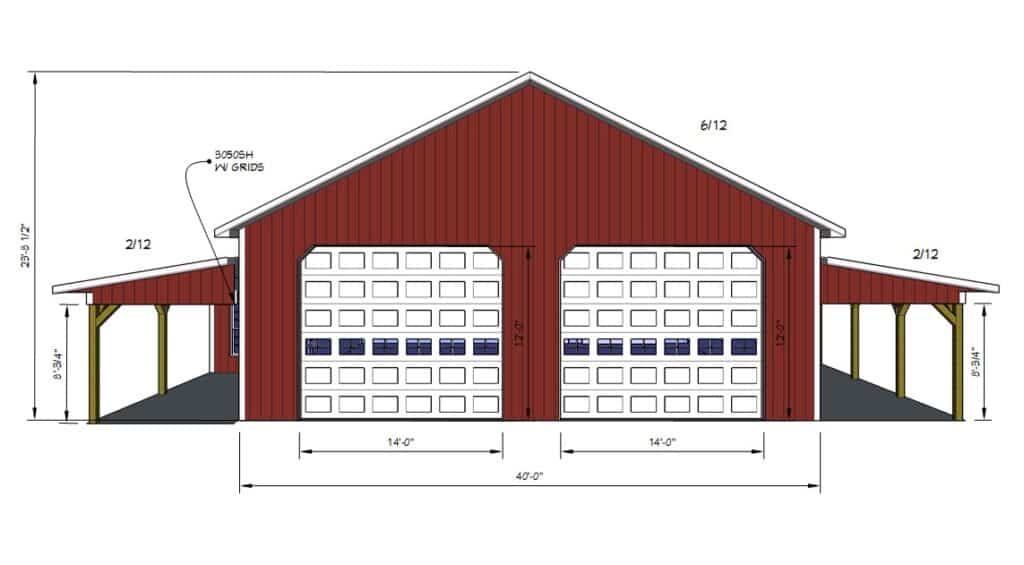
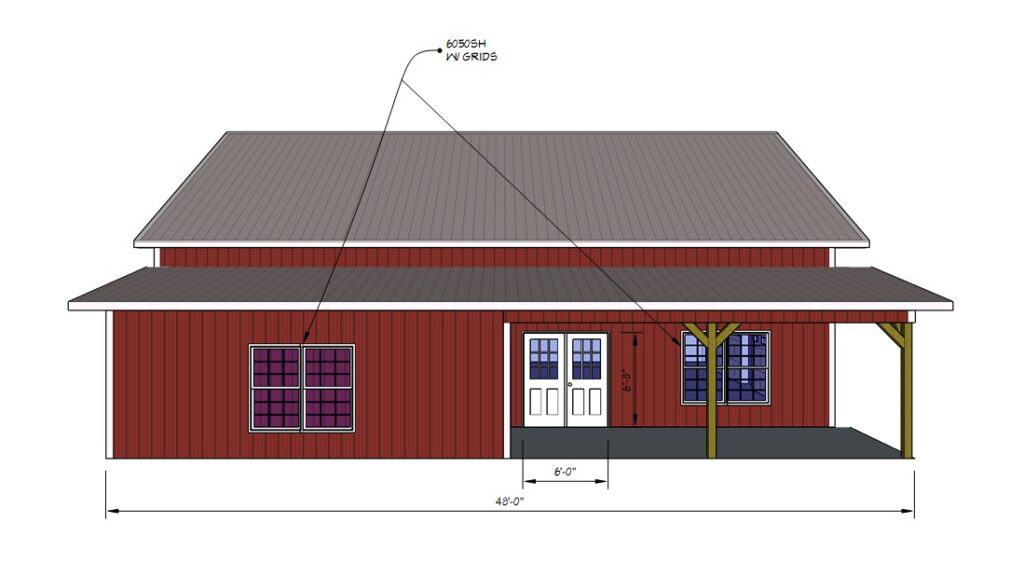
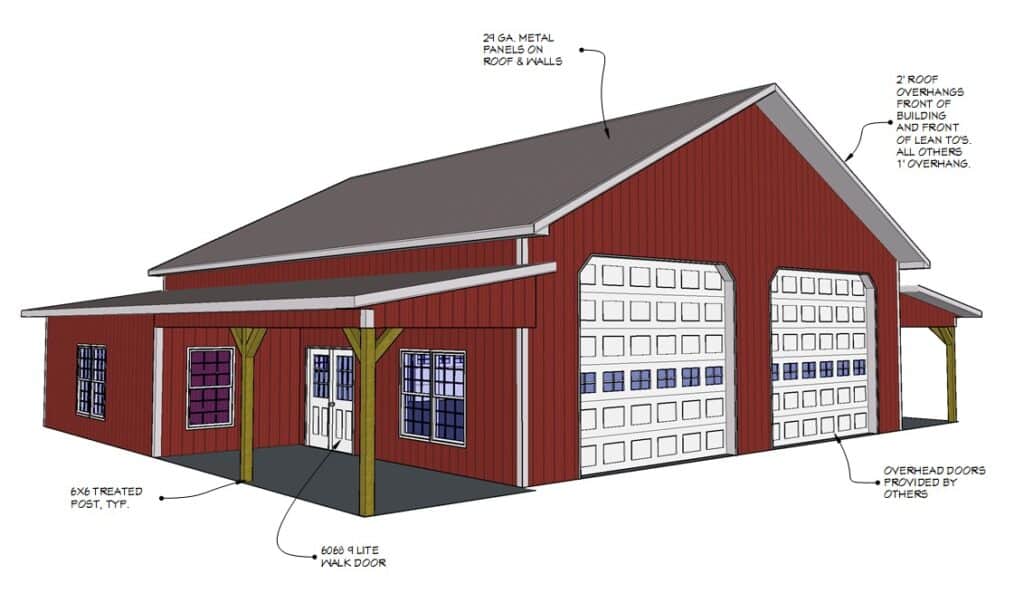
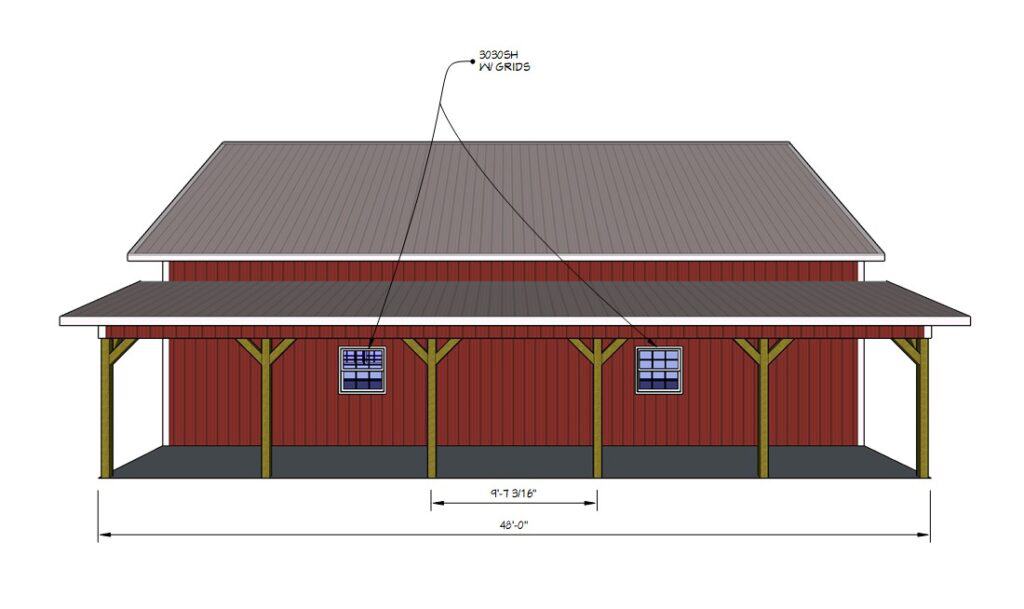
Elevation Drawings
Included are five elevation drawings of your building with exterior measurements and details like roof pitch, widths, lengths, doors, windows, metal gauge and other important notes about the pole barn exterior. A perspective view as well as views of each side of the building are included for your convenience.
Notes & Fasteners
The Notes & Fasteners page includes photos of fasteners needed as well as a fastener schedule that explains where each fastener is used.
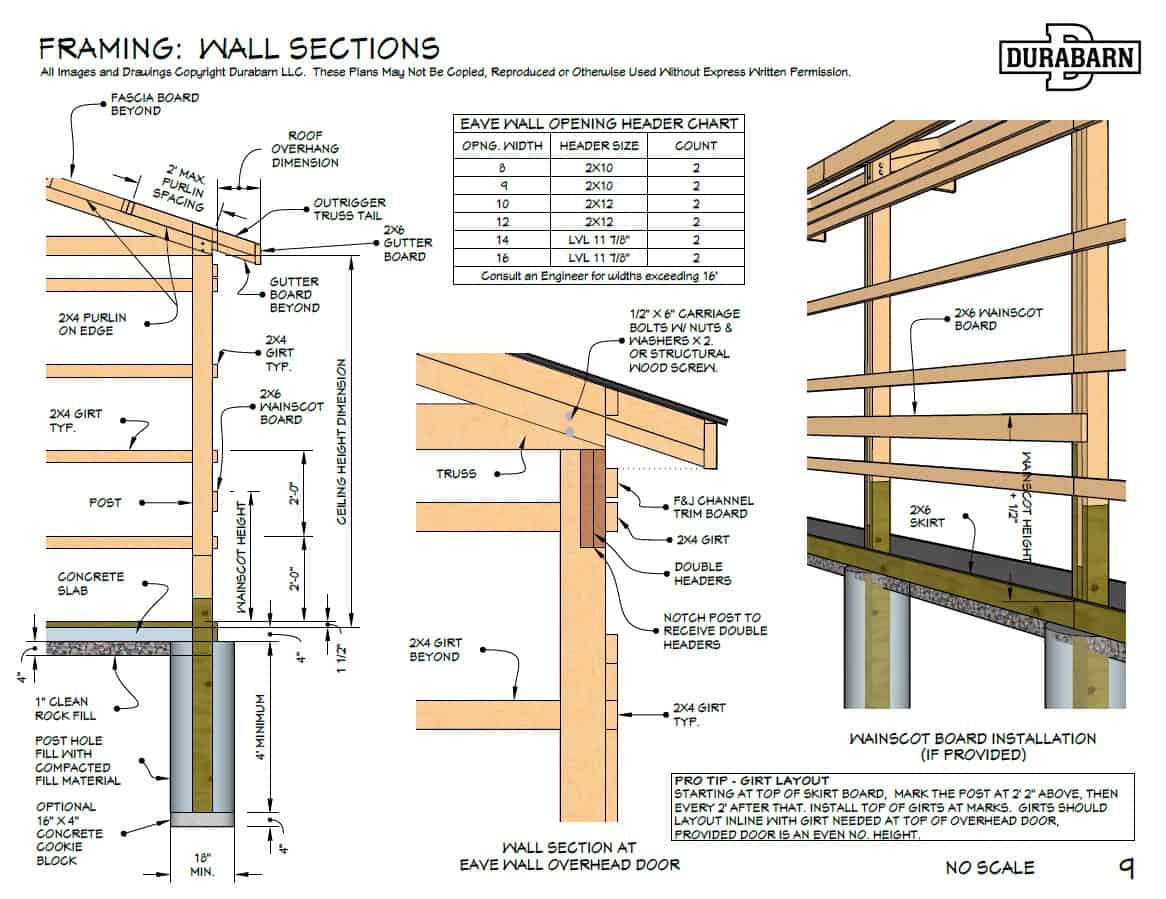
Framing Wall Sections
The Wall Section page shows how the building is constructed. Subgrade materials, post footers, post holes, piers, skirt boards, building posts, concrete slab, girt spacing, wainscot board height, gutterboard, purlins, trusses, ceiling height and more. Additional wall sections are provided throughout the plans where necessary, such as framing for Overhead Door headers.
Trusses
Several pages are included for trusses:
- Truss Information
- Truss Prints
- Reading Truss Prints
Let’s start with the last one. The “Reading Truss Prints” page shows you exactly how to read a truss print from the Engineer, including how to read the specialized measurement standard. We show you exactly where and how to get the information you need to build it right.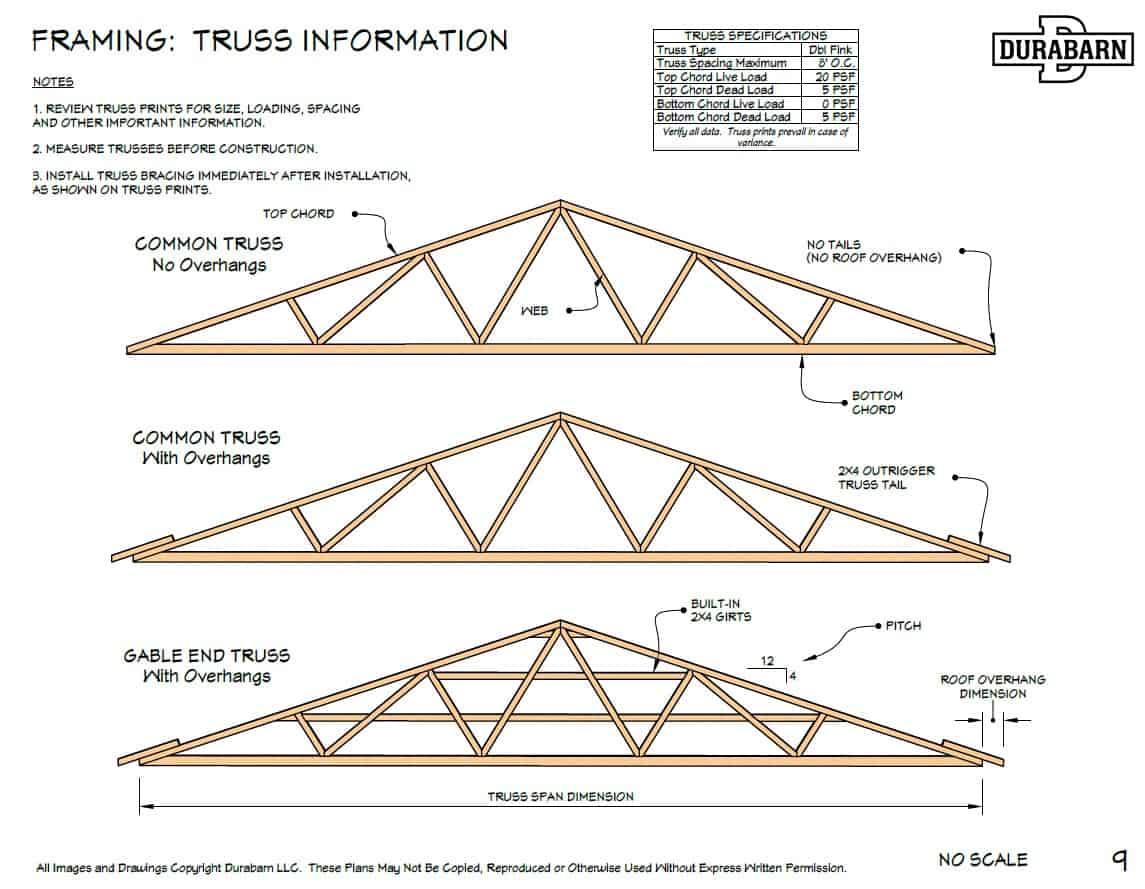
Engineered Truss Prints are included with every building package. Engineer seal and signature is complimentary, if required. Truss prints show count, span, pitch, spacing, truss bracing locations, tails, loading and all associated measurements.
Our Truss Information Page shows your truss specifications and identifies the parts of the truss, including built in girts on certain trusses. It also shows how to measure your roof overhang as well as top chord live and dead load, and bottom chord live and dead load.
Post To Truss Connection
This detail page shows you exactly how and where to connect the truss to the building posts, fasteners, how to rip cut one of the purlins to maintain 2′ on center when your building has roof overhangs and much more.
Framing Gable End Trusses
Our Gable End Truss page shows you how to brace and set your gable end trusses. They’re not done the same way as the common trusses, in fact they’re set on the outside of the posts! Our detail shows you exactly how to do it.
Walk Door Framing
Framing walk doors in a pole barn is much different from framing in a stud wall. No structural headers are needed. Our details shows you how to frame the header soffit, girt blocking, skirt board notch, and more for the perfectly installed walk door.
Window Framing
Much like walk doors, pole barn window framing doesn’t require structural headers. A simple 2×4 header along with girts, blocking and a sill is all that’s necessary for proper framing of a window.
Overhead Door Framing
Our construction plans show every detail of proper framing of an overhead door including the headers, soffit, girts and bracing needed for a solid installation. Details also show the framing differences between overhead doors framed on an eave wall vs. an overhead door framed on a gable wall.
Purlin Framing
Purlin framing pages show exactly how to overlap purlins, attachment to trusses and other purlins as well as how purlins are framed at the eave wall and gable walls. Our plans include an often overlooked critical step in framing an additional purlin to maintain 2′ on center. In addition, we show you details of how to frame the purlins for the ridge cap.
Astro Armour Installation
We show you exactly how to install your Astro Armour vapor barrier under the roof metal. How to overlap, drape materials and attach to purlins.
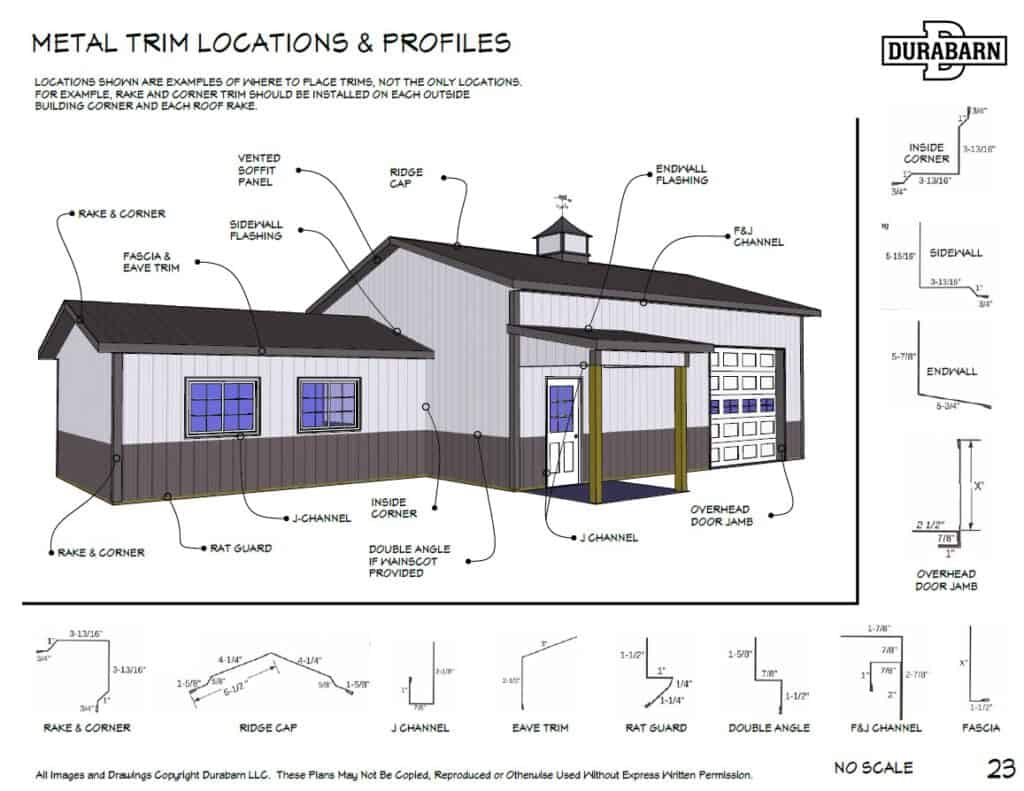
Metal Trim Locations & Profiles
Our overview on metal trim locations will help tremendously, as well as the trim profiles on the same page. When you receive your metal trims, many of them look quite alike all bundled up. Our trim profile detail page will help you sort them out for a quick installation.
Metal Panel Installation
Our metal panel installation pages show you exactly how to install panels for the roof and walls. Details include screw patterns, proper screw drive, considering prevailing wind direction, side laps, how far to overhang eave edge, trim installation and more. Our plans even show you the placement of each pre-cut metal panel, so there’s no waste or accidents.